It happens all too often; remodeling contractors and home builders leave annoying gabs between the bottom of your kitchen cabinets and the flooring or the counter top. Not only are these gaps eyesores; they can also be a welcome mat for pests and make your cabinets more susceptible to water damage.
Chances are you paid a pretty penny for your cabinets so these gaps should be sealed as soon as possible. The good news is that there is in fact an easy way to seal these annoying kitchen cabinet gaps. In the following article we will be discussing why it’s important to seal the bottoms of your kitchen cabinets as well as sharing a simple guide.
The Reasons for Sealing Kitchen Cabinet Gaps
A lot of people may be able to overlook these small gaps because they are, in fact, small. However, there are a few practical reasons why you should seal these gaps:
- Dirty Cabinets – You may not be able to see it on a day-to-day basis but these small gaps can get filled with small crumbs, dust and other food particles. Over time, the gaps will get dirty and so will the inside of your cabinets. Plus, once small particles get in there, they’re impossible to get out!
- Pest Control – If you’re cabinets have been raided by pests then the gaps at the bottom may be to blame. These small gaps are exceptionally easy avenues for ants and other insects to burrow their way into your cabinets and whatever’s inside!
- Longevity – Believe it or not these small gaps can cut the lifespan of your cabinets in half. The tiny holes can expose the inner parts of your cabinet wood to air, water and other elements that will detriment the structural integrity of the cabinet.
Get your Supplies Ready
It should be noted that there are a few ways to seal the bottom of kitchen cabinets. However, we focused on one method for this guide because it is by far the simplest and quickest. You don’t have to be a carpenter to seal the bottoms of your cabinets – anyone can do it using this simple method.
But first, you have to arm yourself with the right tools an equipment. Here is what you will need to follow our guide:
- Blue painter’s tape. Masking tape will work fine as well.
- An all purpose kitchen cleanser; preferably a gentle or natural one.
- A rag
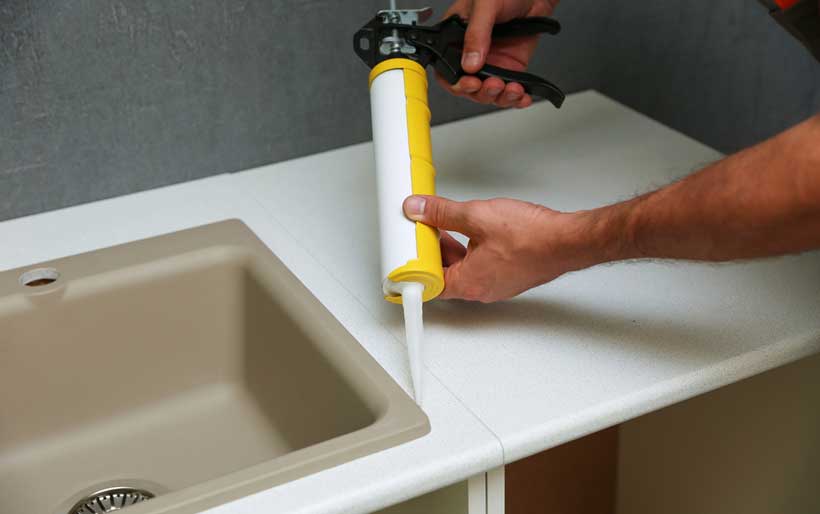
- A tube of caulk. You may also need a caulk gun if the tube you buy requires one but it’s not necessary. It’s important to try to get a color of caulk that matches your cabinets or your kitchen floor’s color as closely as possible.
The Guide for Sealing the Bottoms of your Kitchen Cabinets
Now that you have your supplies ready it’s time to start sealing the bottom of your kitchen cabinets. Take a look at our ridiculously simply guide:
- Clean the Area – Using your rag and your kitchen cleanser, wipe down the area that you need to seal. If you don’t have a gentle kitchen cleanser, you can mix warm water, vinegar and lemon juice for an effective and natural cleanser.
- Dry the Area – It’s best to dry the area a couple of minutes after you clean it as opposed to letting it dry on it’s own. This will protect the wood and save you some time. Just be sure the area is completely dry before applying your painter’s tape and caulk.
- Tape Above and Below the Gap – Once dry, you’ll need to tape off the area directly above and below the gap. This can be tricky but do your best to leave only the gap itself uncovered by the tape.
- Fill the Gap – Using your tube of caulk and/or caulking gun apply a thin layer to the gap in sections that span no more than 3 feet at a time. The reason for this is that you will need to smooth the caulk before it can dry so you don’t want to spread too much at once.
- Smooth the Caulk – Using your fingertips, smooth out the caulk while making sure it makes its way into the gap. It’s important to try to get as much excess caulk off the cabinet as possible to achieve a uniform look.
- The Satisfying Part – By far the most satisfying part of this process is removing the tape. Slowly peel off the tape and be sure to do so before the caulk has a chance to dry.